If I told you the truth that this smoothie was inspired by my daughter’s leftover frozen babyfood, promise me you won’t hit Back on your browser? I had loads of left over frozen butternut squash puree that I threw into a smoothie one day. The result was creamy, flavorful, and glycemic-balanced with a flavor reminiscent of the Schwann’s man push pops from the 90s (are those still a thing?). To me, it’s not a smoothie if it doesn’t have a veggie. I’ve used both the butternut squash cubes from the natural foods freezer and the spirals found in the main freezer section. The mild taste of butternut squash blends right in to the creamy orange flavor, but I encourage you to experiment with your favorite brightly colored fruits and veggies:
Yellow/orange vegetables: butternut squash, acorn squash, pumpkin, sweet potatoes, carrots
Yellow/orange fruits: peaches, bananas, mangos, papaya, cantaloupe, oranges, clementines, pineapple, lemon

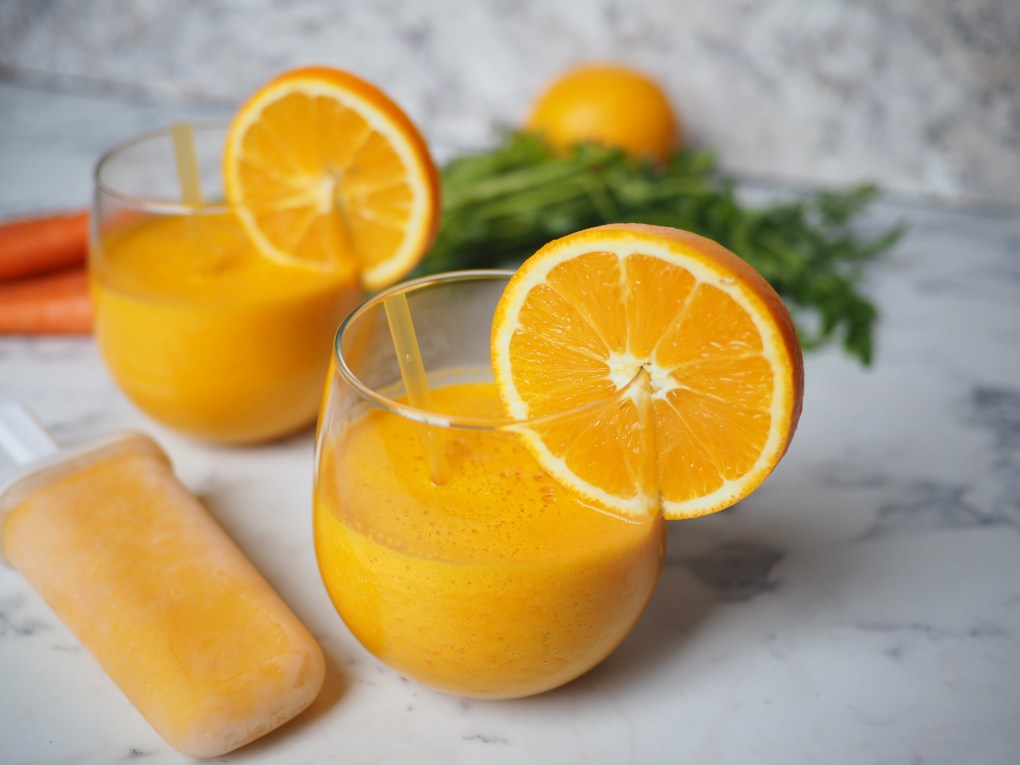
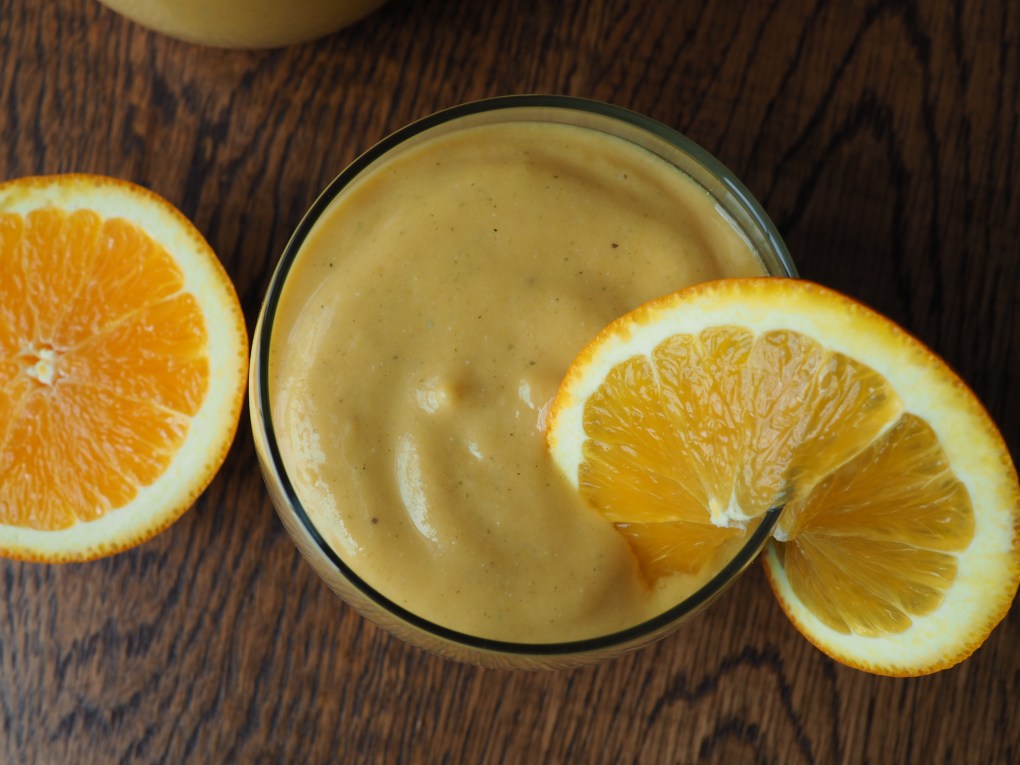
Orange Dreamsicle Smoothie
Orange produce is usually loaded with Beta Carotene, a pre-courser to Vitamin A. Your body burns through Vitamin A during times of illness (don’t believe me? test your night vision next time you’re sick!). Vitamin A is ONLY found in animal products. You may be thinking, “wait, I thought my canned pumpkin said 130% of vitamin A?” That label is assuming that under the perfect circumstances, with the perfect genetics, with the perfect nutritional mechanisms, you COULD convert the amount of Beta Carotene in that can of pumpkin into that much Vitamin A. Most of our bodies aren’t walking around in a state of nutritional perfection though, so we aren’t getting what that label promises. All the more reason to get daily sources of rich orange/yellow produce in the diet.
Orange Dreamsicle Smoothie
Ingredients
Orange Dreamsicle Smoothie
- 1 cup non-dairy milk of choice (almond, coconut, or oat milk)
- 1/2 cup orange juice (or 2 Tbsp of frozen OJ concentrate)
- 2 large oranges, peeled, or 4 small clementines/Cuties
- 2 ripe bananas
- 1/2 teaspoon vanilla
- 2 Tbsp coconut oil
- 3 Tbsp seeds of choice (hemp hearts, chia seeds, or flaxseeds)
- 1 cup cooked or frozen butternut squash
- 1 cup frozen mangoes
- Small handful of red raspberries (see note)**
Optional: add a scoop of collagen powder or this Vega Tropical Tango Smoothie powder for bonus protein. I don’t use protein powders with my kids, so we’ve settled on protein coming from the hemp seeds in the recipe above.
**Adding just a few raspberries enhances the color, taking it from a dull yellow to a bright orange. It’s an optional step, but an aesthetic one that helps picky eaters who eat with their eyes first. About 5-7 red raspberries is enough to do the trick!
Directions
Add all ingredients in the order given and blend! Remember all frozen food should always go last into your blender for the best blending.
Refrigerate left overs in sealed glass jars for up to 3 days or freeze for up to 3-6 months.
Photos and Content Copyright © Jaclyn Beaty Nutrition, 2019