Summer’s Sweetest Superfoods

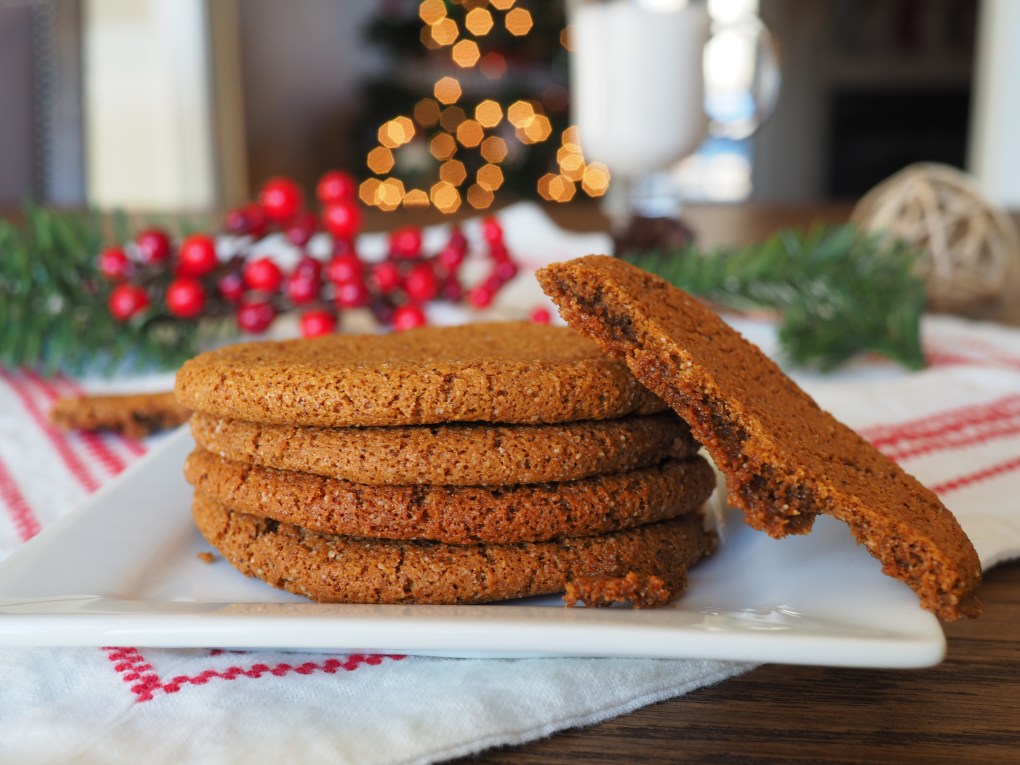
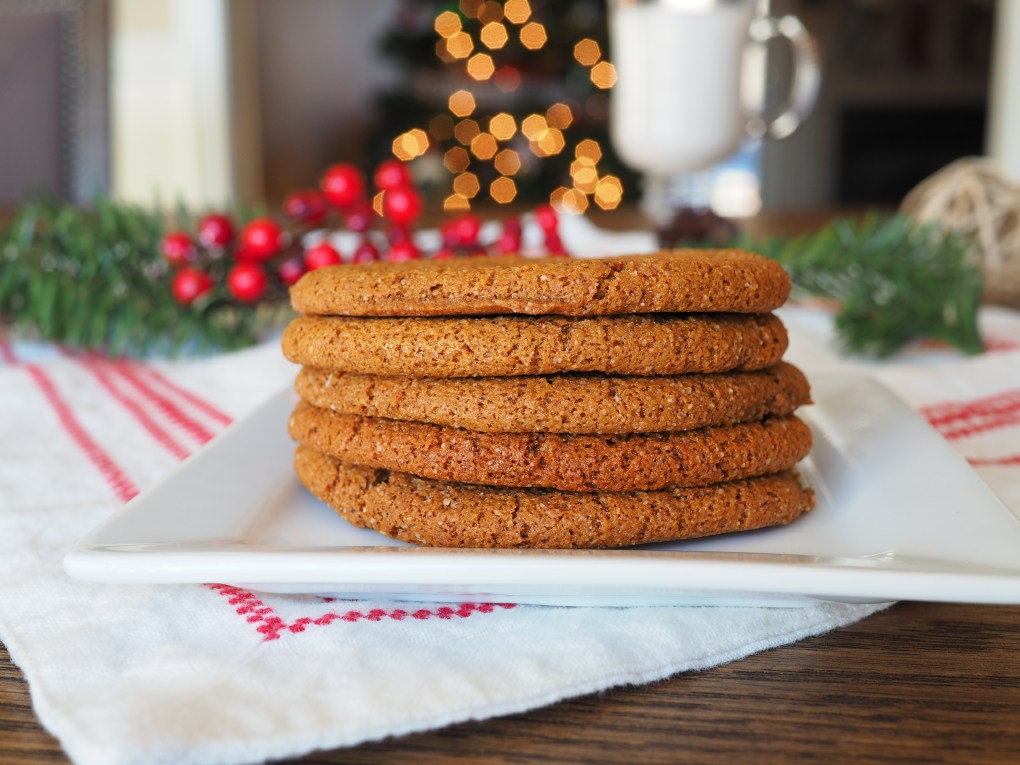
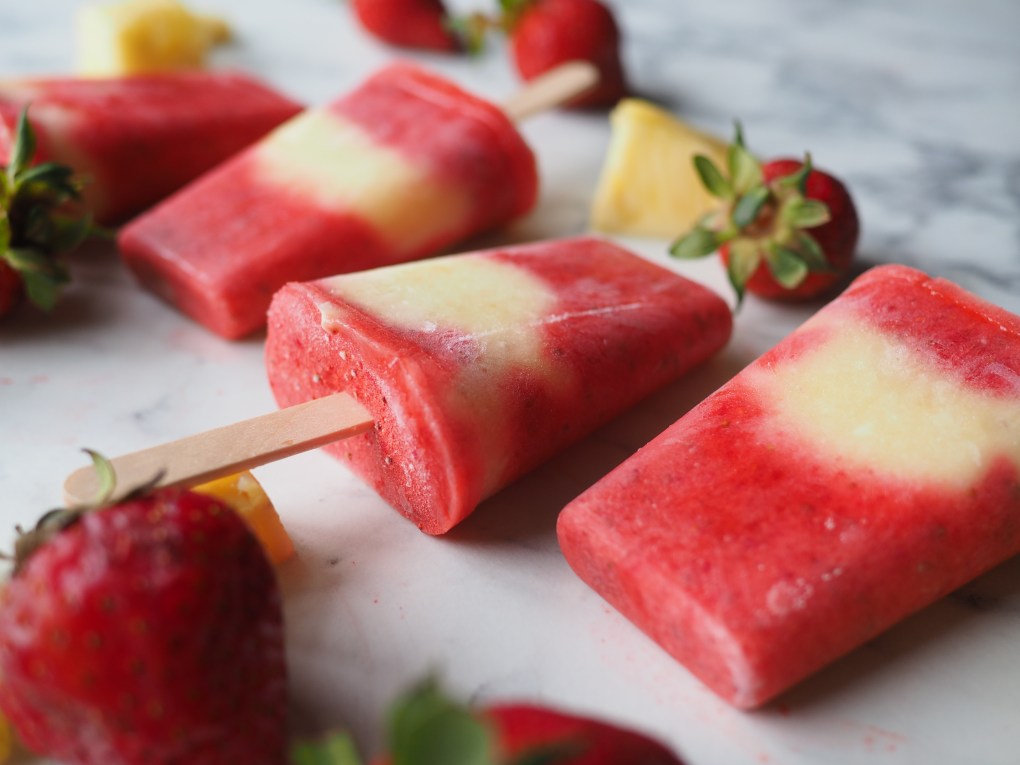
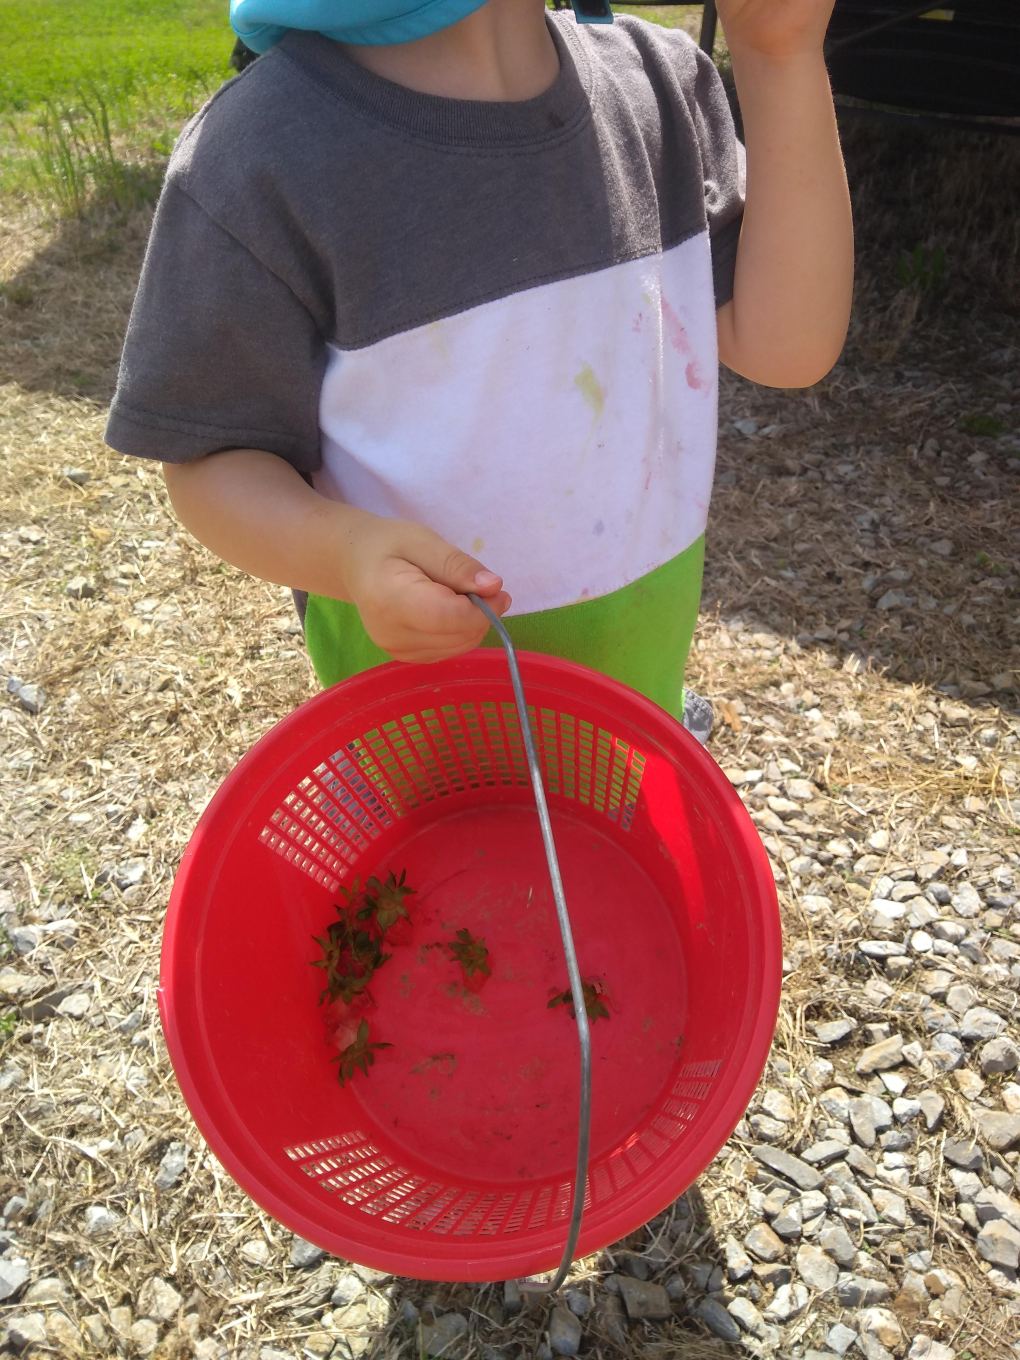
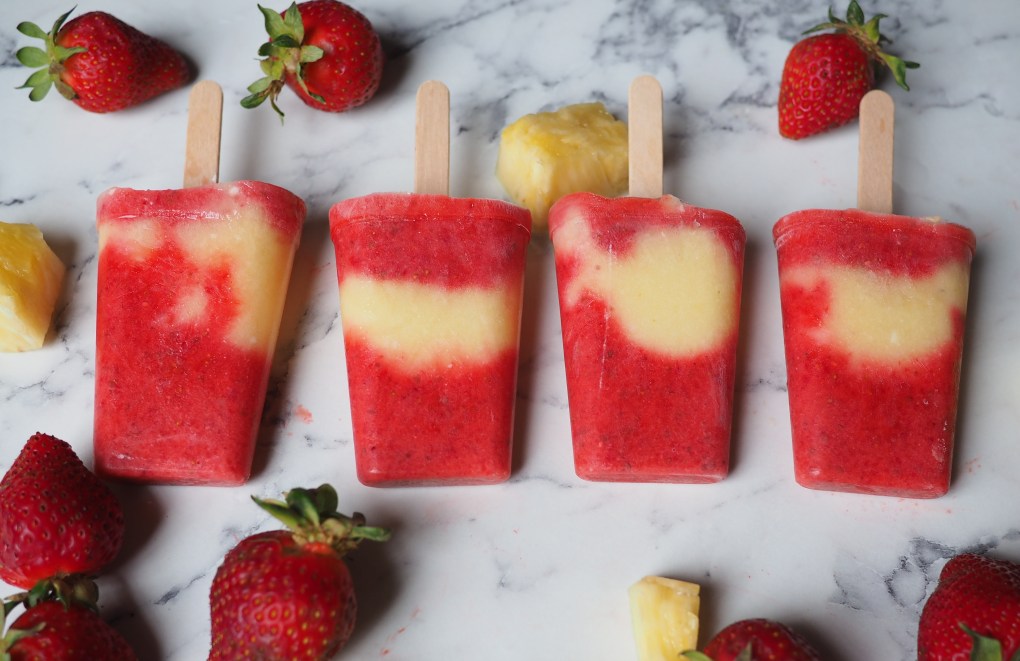
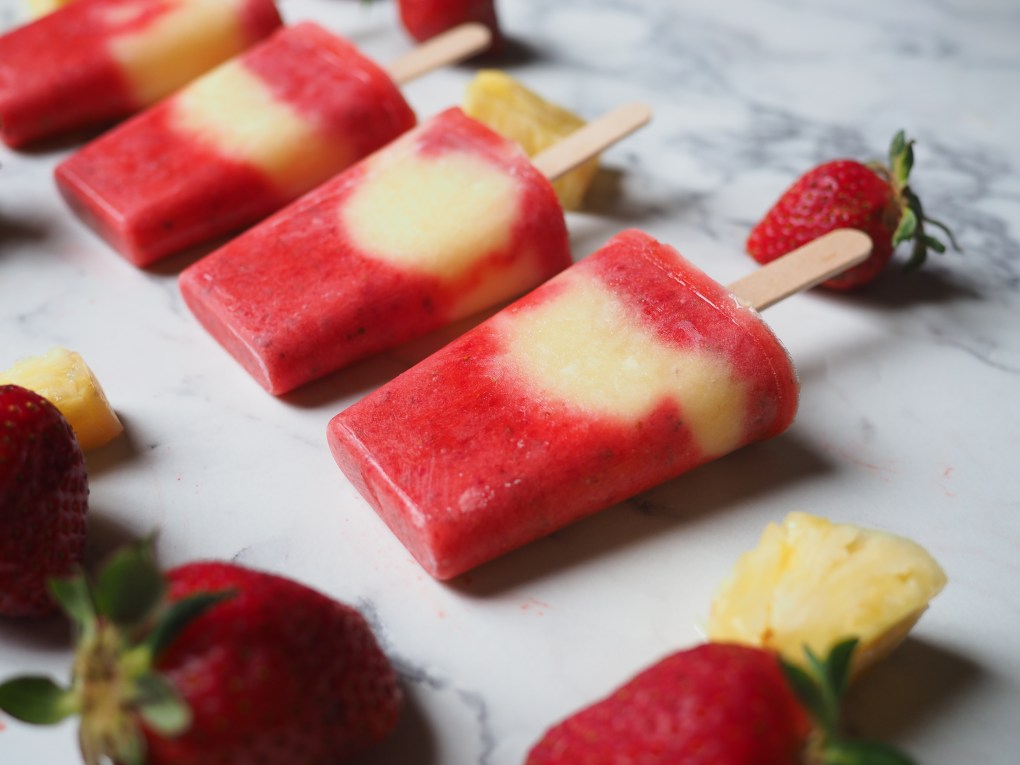
Anything in a popsicle shape is like contraband to my kids. Now that summer cranked up the heat, I’ve been stocking my freezer with popsicles made from left over smoothies. This is one of my sneakiest childhood nutrition tricks, and it takes zero additional prep time if you’re already in the habit of smoothie making.

  • Step 1) Make a smoothie
  • Step 2) Pour it into a popsicle mold

Don’t have popsicle molds? Grab some Dixie cups and wooden popsicle sticks and let them stand on a flat surface in the freezer to harden.

The best part of these treats is that they’re loaded with fiber, fat, and protein which is the holy trinity of fuel for little bodies. They get to choose which color they want, and even if they didn’t love the smoothie when first served at a breakfast, there’s no debating they will suddenly love it when it’s offered outside as a cool down treat.

OLYMPUS DIGITAL CAMERA

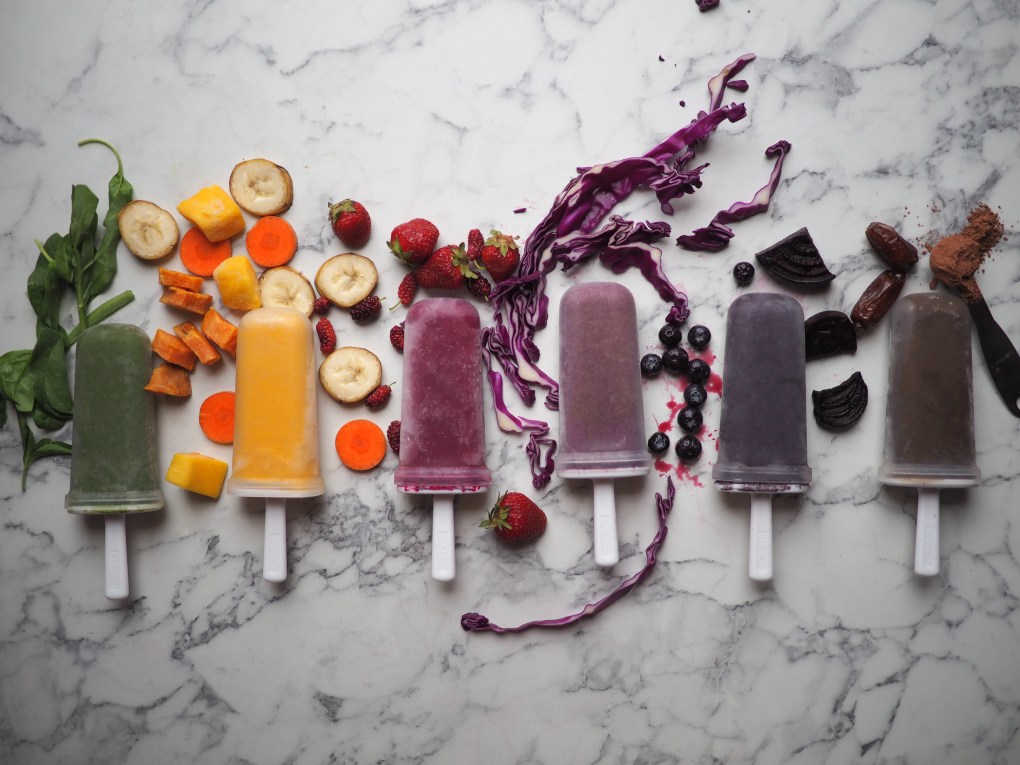
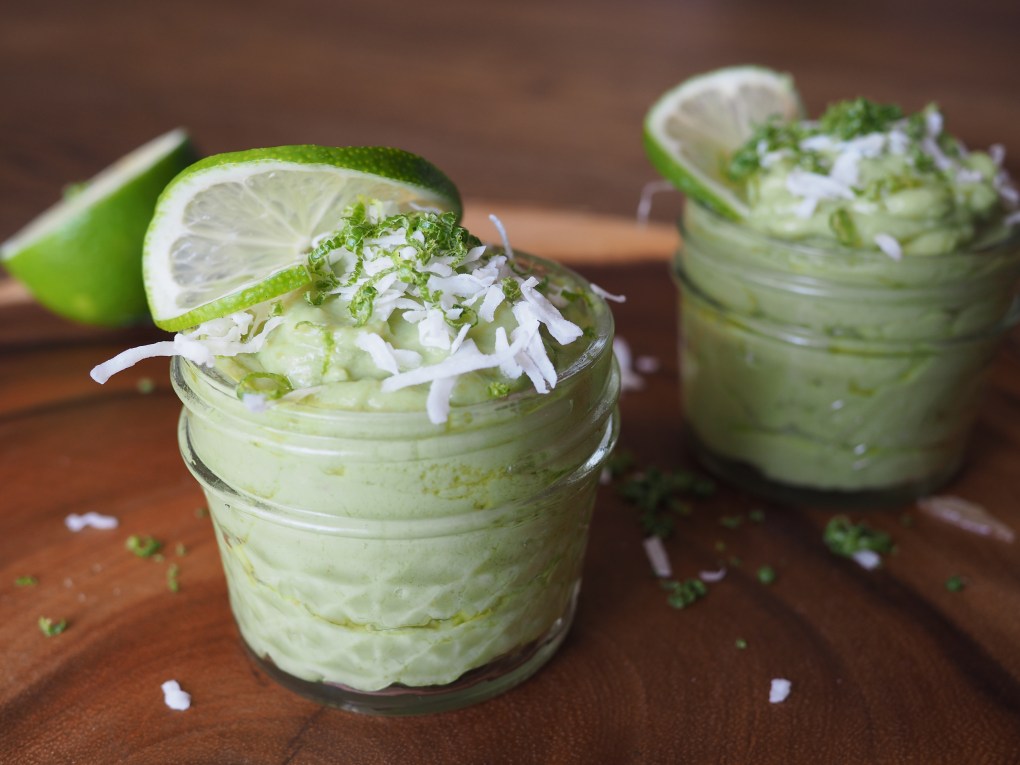
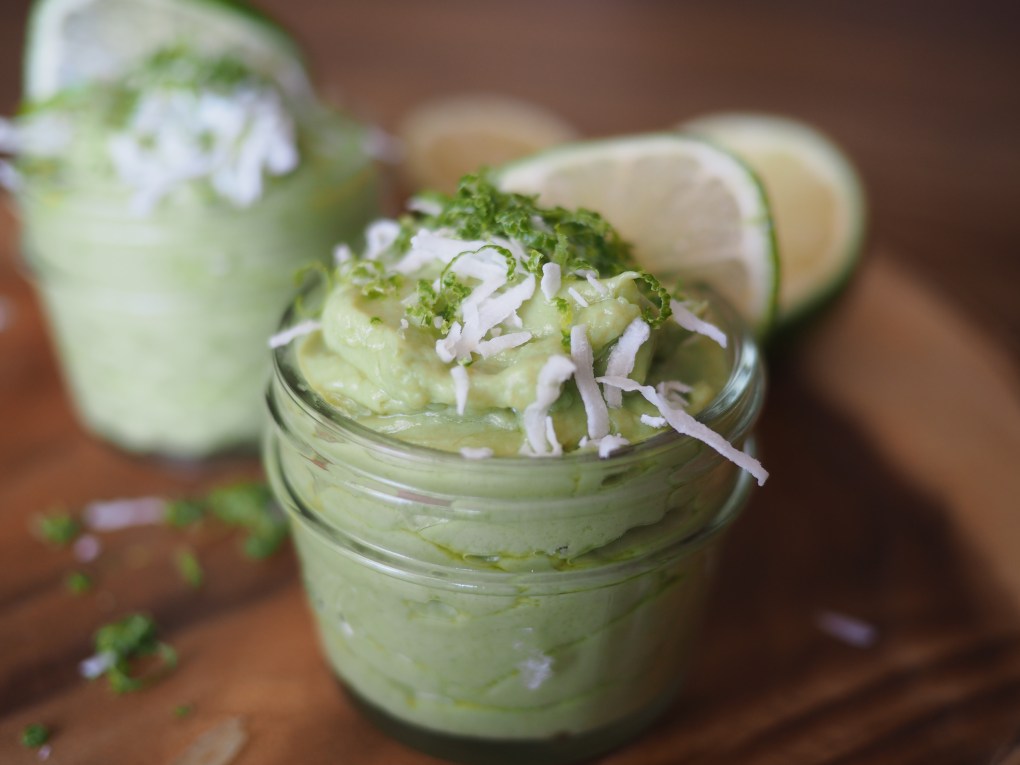
Since all my smoothie recipes contain at least one, if not more, vegetables, kids get a healthy dose of antioxidants and phytochemicals in a fun-to-eat snack. Below are the links to all my favorite smoothies along with their sneaky vegetables:

OLYMPUS DIGITAL CAMERA

Photos and Content Copyright © Jaclyn Beaty Nutrition, 2020


Molasses Spice Cookies

Iron-rich molasses, heaps of anti-inflammatory spices, and protein from almond butter make this cookie a reasonable, yet sweet, holiday treat. Growing up, my mom’s famous molasses cookies were an unspoken part of every Christmas. This recipe was an easy one to re-invent, using my Sneaky Snickerdoodles as a starting point, simply swapping out the maple syrup for molasses and tossing in a few more spices. The result is crispy on the outside, gooey on the inside, and now a new part of my Christmas!

OLYMPUS DIGITAL CAMERA

Although molasses isn’t considered a refined sugar or among the “white devils” it still contributes a fair amount of sugar in these cookies. They are sweet enough without frosting, but if you are serving these to anyone with a hole in their sweet tooth, this egg nog buttercream frosting is a delicious addition. These no longer keep the cookie dairy-free or refined sugar-free, but it does make it look festive!

OLYMPUS DIGITAL CAMERA

Egg Nog Buttercream Frosting (Optional)

  • 1/4 cup butter, melted
  • 2 cups powered sugar
  • 2 teaspoons egg nog
  • Dash nutmeg

Mix all together in a mixer until sugar is dissolved and frosting looks glossy. Spread a thin even layer on top of cookies and sprinkle a dusting of nutmeg to decorate.

Molasses Spice Cookies

  • Servings: 18 cookies
  • Difficulty: Easy
  • Print

Ingredients

Molasses Spice Cookie Ingredients

  • 2 1/2 cups almond flour or almond meal
  • 3/4 cup molasses
  • 1/2 cup almond butter*
  • 2 teaspoons cinnamon
  • 1 teaspoon cloves
  • 1 teaspoon ground ginger
  • 1/2 teaspoon all-spice
  • 1 Tbsp coconut oil
  • 1 tsp baking soda
  • 1/2 tsp sea salt

*Runny almond butter is best! A jar is usually the runniest when newly opened. If you’re scraping the bottom of the barrel on your almond butter, add an additional 1-2 teaspoons of coconut oil to the recipe.

Directions

Preheat oven to 350 degrees and line a cookie sheet with parchment paper. In a large mixing bowl or stand mixer bowl, add all ingredients in the order given. Mix just until all ingredients are incorporated.

Scoop 1 inch round balls of dough onto prepared cookie sheet. You may choose to roll them in your hands or use a cookie dough scoop for more consistency. Using the bottom of a glass jar or cup, flatten the balls into round cookies, about 1/4″ thick.

Bake for approximately 10 minutes. If you like a gooier cookie, pull them out sooner, around 8 minutes. Transfer to a wire wrack to cool completely. Store them in a tightly sealed container for up to a week in the refrigerator or 3-6 months in the freezer.

Photos and Content Copyright © Jaclyn Beaty Nutrition, 2019


Key Lime Avocado Mousse

This is one of the most deliciously sweet ways I could possibly think to eat avocado. My family went on a key lime pie hummus kick for a while, but the chickpeas just weren’t doing it for me anymore. I have a delicious chocolate avocado mousse recipe but I explored the realm of the true green avocado color and created a mouth-watering and guilt-free treat. The healthy fats and natural sweetness from avocado and coconut butter crowd out unnecessary sugar. Top with shredded coconut flakes, graham cracker crumbs, coconut chips, lime zest, or white chocolate. You can’t go wrong!

OLYMPUS DIGITAL CAMERA

Load up a ramekin or small mason jar for a perfect portion and chill these before serving. The acidity from the lime juice will keep the avocado from turning brown so they are a perfect make-ahead dessert for company.

OLYMPUS DIGITAL CAMERA

Key Lime Avocado Mousse

  • Servings: Four, 4oz servings
  • Difficulty: Easy
  • Print

Ingredients

Key Lime Avocado Mousse

  • 2 large or 3 small avocados
  • Zest, juice, and pulp of 1 whole lime (approx 2 Tbsp lime juice, 1-2 tsp grated zest)
  • 2 Tbsp coconut butter
  • 2 Tbsp coconut milk
  • 2 Tbsp maple syrup
  • 1 tsp vanilla
  • Coconut flakes for topping (optional)

Directions

Zest the rind of 1 lime, saving aside approximately 2 teaspoons of grated lime zest. In a food processor, add the flesh from the avocado, pulp and juice from what remains of the lime, coconut butter, coconut milk, maple syrup, and vanilla. Blend until a smooth and whipped consistency is achieved.

Pour mousse into single-serving dishes and top with grated lime zest and coconut flakes. Chill approximately 3 hours before serving, as this will give the mousse a firmer texture. Keep refrigerated for up to 4 days.

Photos and Content Copyright © Jaclyn Beaty Nutrition, 2019


Strawberry Pineapple Popsicles

It’s only May, but the summer heat is around to stay in Tennessee and my family is soaking up every ray of sunshine we can get. The transition from spring to summer means the berry fields are ripe for the picking and coincidentally, that popsicles become perfectly acceptable for snack time. One of my favorite ways to use strawberries is in my Strawberry Banana Detox Smoothie and Strawberry Quinoa Pancakes but getting covered in sticky, melty popsicle juice is quintessentially a summer must.

OLYMPUS DIGITAL CAMERA

I follow the Environmental Working Group’s Clean 15 and Dirty Dozen lists when choosing to buy organic. Strawberries have topped the charts for the last 3 consecutive years as the #1 most highly sprayed crop in America. Most strawberries tested contain at least 20 different chemicals (some up to 40!) a few of them even being known carcinogens. For that reason, I will always choose to buy organic strawberries and also choose to drive a little farther to pick from the berry fields that don’t spray. I know there is no stopping a toddler from eating straight from the plant, but knowing that a farm doesn’t spray allows me the peace of mind when I see my kid eating his weight in berries straight from the patch. This was his bucket after an hour in the field. So much for my field hand! IMG_20190508_105351491

These popsicles take literally zero culinary expertise and can be customized to virtually any fruit and sweetened up or down to your taste preferences. I like to add chia seeds to mine for a quick dose of healthy fats and mucilaginous fiber for gut health. I also choose to blend full-fat coconut milk into both layers of fruit so the kiddos are getting more than simple fructose into their blood stream.

OLYMPUS DIGITAL CAMERA

Strawberry Pineapple Popsicles

  • Servings: Eight, 4oz servings
  • Difficulty: Easy
  • Print

Ingredients

Strawberry Pineapple Popsicles

  • 1 cup full-fat coconut milk, divided
  • 1 cup fresh or frozen strawberries
  • 3 Tbsp chia seeds
  • 1 cup fresh or frozen pineapple
  • Honey (optional)

Directions

In a food processor, add the strawberries (or other fruit of choice), a half a cup of coconut milk and the chia seeds. I only add chia seeds to one of the two layers, and chose to add it to the strawberries since they are naturally seedy. Pulse until just blended, leaving some bigger bits of berry. You may wish to add a teaspoon of honey into each blend if you are aiming for a sweeter pop, but I find the natural sweetness of the berries and pineapple perfect as is! Pour into a bowl and set aside. You may wish to give your food processor a quick rinse before blending the pineapple so the colors don’t run, but it’s not necessary.

For the second layer, blend the pineapple and half a cup of coconut milk until smooth. Alternate layers into popsicle molds filling each mold one-third of the way, alternating layers with fruit blends. Freeze for at least 3 hours or until set and keep frozen until ready to enjoy!

Photos and Content Copyright © Jaclyn Beaty Nutrition, 2019


Sneaky Snickerdoodles

My son’s first cookie was this little gem. He was almost 2.5 and loved helping cook most things, but wasn’t old enough for me to feel comfortable letting him eat anything. When cookies started appearing in many of the books we’d read, I knew a cookie was in his near future. I was a-okay with this being his first bite. I call them sneaky snickerdoodles because they’re more like a bite-sized protein snack, not the highly-processed, overly-sweet, refined cookie much of the world has come to know and love. Seven ingredients also make it ideal for little hands to help mix and stir, and you don’t have to worry about them snitching raw egg dough because they’re egg free!

OLYMPUS DIGITAL CAMERA

When it comes to optimal health, managing blood sugar balance is paramount. I talk a lot about blood sugar balance in my recipes because it’s worth repeating. It’s not just something that people with diabetes have to pay attention to. It’s essential for everyone if you want to feel your best emotionally and physically! There’s no population who suffers greater from blood sugar spikes than KIDS. Little ones aren’t cognitively capable of interpreting the feedback their body is giving them. Let’s be honest, many adults aren’t mindful of the language their body speaks either. One of the best ways to keep blood sugar stable is to not let it spike in the first place! Simple refined sugars cause an immediate surge of sugars into the blood stream. The pancreas overreacts by secreting insulin to drive that sugar into cells, which in turn causes the blood sugar to fall even lower- known as blood sugar rebounding. It’s a roller coaster of hormones that are trying to manage our roller coaster of emotions and energy.

OLYMPUS DIGITAL CAMERA

These are a one-bowl wonder, so clean up is a cinch. Most cookie recipes separate wet and dry ingredients, but I find that to be an unnecessary step (you’re welcome). When I had to go egg-free and dairy-free in the early days of nursing #2, these were my jam. Or maybe it’s more accurate to say the cookie dough was my saving grace. Sweet enough to calm a sugar craving, and enough protein and fat that I didn’t keep eating uncontrollably!

Sneaky Snickerdoodles

  • Servings: 18 cookies
  • Difficulty: Easy
  • Print

Ingredients

Sneaky Snickerdoodle Ingredients

  • 2 1/2 cups almond flour or almond meal
  • 3/4 cup maple syrup
  • 1/2 cup almond butter*
  • 1 1/2 Tbsp cinnamon
  • 1 Tbsp coconut oil
  • 1 tsp baking soda
  • 1/2 tsp sea salt
  • 1/2 tsp vanilla

*Runny almond butter is best! A jar is usually the runniest when newly opened. If you’re scraping the bottom of the barrel on your almond butter, add an additional 1-2 teaspoons of coconut oil to the recipe.

Directions

Preheat oven to 350 degrees and line a cookie sheet with parchment paper. In a large mixing bowl or stand mixer bowl, add all ingredients in the order given. Mix just until all ingredients are incorporated.

Scoop 1 inch round balls of dough onto prepared cookie sheet. You may choose to roll them in your hands or use a cookie dough scoop for more consistency. Using the bottom of a glass jar or cup, flatten the balls into round cookies, about 1/4″ thick.

Bake for approximately 10 minutes. If you like a gooier cookie, pull them out sooner, around 8 minutes. Transfer to a wire wrack to cool completely. Store them in a tightly sealed container for up to a week in the refrigerator or 3-6 months in the freezer.

Photos and Content Copyright © Jaclyn Beaty Nutrition, 2019


Pumpkin Spice Dark Chocolate Truffles

I have a confession. I don’t understand the Pumpkin Spice obsession. Before you discredit my true affection for all things food and fall, let me justify my stance. For one, I don’t drink coffee so the #PSL rage has never been on my radar. Secondly, I’m no fair weather pumpkin lover. I eat it for breakfast year round, so to me, it’s just as commonplace as a box of cereal. So to get all giddy on September 1 (when it’s socially justifiable) to consume large amounts of all things pumpkin seems a bit disingenuous.

OLYMPUS DIGITAL CAMERA

But these. These Pumpkin Spice Dark Chocolate Truffles have won me over as THE treat that will make a believer out of anyone who is judgy toward the beloved pumpkin spice. These Paleo bites have the perfect blend of cakey center with hard dark chocolate shell, and perfectly sized for losing control of portions. They’re so easy to make, my 2-year old mixed everything into the food processor and pulsed it until I told him to stop. Then I took over to roll the truffles before my kitchen got destroyed by willing but unable hands.

OLYMPUS DIGITAL CAMERA

Pumpkin Spice Dark Chocolate Truffles

  • Servings: 32
  • Difficulty: Easy
  • Print

Ingredients

Truffle Center:

  • 2 1/4 cup coconut flour
  • 1 15oz can solid packed pumpkin puree
  • 1/4 cup pure maple syrup
  • 1/4 cup almond butter
  • 1 1/2 teaspoons cinnamon
  • 1 1/2 teaspoons pumpkin pie spice
  • 1/2 teaspoon vanilla extract

Chocolate Shell:

  • 1 12oz bag of dark chocolate chunks
  • 1 teaspoon coconut oil
  • 1/4 cup chopped pecans

Directions

In a food processor, combine all ingredients for the center and pulse until a doughy, cakey consistency is achieved. It should be soft but malleable. Form into 1″ balls and place on a cookie sheet covered in parchment paper. Pop these in the freezer or fridge while you begin to prepare the chocolate shell.

In a small saucepan, melt the dark chocolate chips and coconut oil together until smooth. Remove the truffles from the freezer and roll them one at a time in the melted chocolate using a spoon to coat all surfaces. Before the chocolate sets, sprinkle with pecan crumbs or sprinkle of cinnamon to garnish.  Keep cold until you’re ready to serve!

Photos and Content Copyright © Jaclyn Beaty Nutrition, 2018


Raw Peaches and Cream Tart

Most raw desserts are a guilt-free treat because of their fresh, unprocessed, and low-sugar contents. Hearing the word “raw” may evoke thoughts of food borne illness spread from uncooked meat, but in this context, it’s simply implying the ingredients haven’t been baked or cooked. Raw desserts are great summer foods because you don’t have to fire up the oven to satisfy your sweet tooth. The great thing about many raw desserts is once you find a base you like, you can use that same recipe in many different contexts. For example, the base in this tart could easily be converted to a lemon pie crust, pear tartlets, or granola bar base.

OLYMPUS DIGITAL CAMERA

Here in the south it’s still in the mid-90s this time of year, and the Georgia peach truck just rolled through town. My mom and I split a 20 pound box of juicy Georgia peaches, and this is one of the outcomes of that purchase.

OLYMPUS DIGITAL CAMERA

Raw Peaches and Cream Tart

  • Servings: 12
  • Difficulty: Moderate
  • Print

Ingredients

Crust:

  • 1 cup raw unsalted cashews
  • 7 pitted medjool dates
  • 1/4 cup coconut oil
  • 1 teaspoon lemon juice
  • 1 teaspoon lemon zest

Cream:

  • 1 can full fat coconut cream
  • 1 teaspoon vanilla
  • 2 teaspoons gelatin

Topping:

  • 2 peaches, sliced
  • 1 teaspoon lemon zest

Directions

In a food processor, combine all ingredients for the crust and pulse until a doughy, thick consistency is achieved. It should be soft but malleable. Form this crust into your desired shape and size. This recipes makes approximately a 9″ circle x 1″ thick. Slip this crust into the freezer while you make the cream filling. For the coconut cream, use a high speed food processor or stand mixer. Blend together the can of full fat coconut milk, vanilla, and gelatin for approximately 5 minutes or until a whipped cream consistency is achieved. Top the cold crust with the filling, and fan thinly sliced peaches. Garnish with lemon zest. Keep cold until you’re ready to serve!

Photos and Content Copyright © Jaclyn Beaty Nutrition, 2018


Chocolate Avocado Mousse

Most people don’t get adequate healthy fats in their diet, which can contribute to a host of health issues including depression, high cholesterol, trouble sleeping, sugar cravings, dry skin and hair, and metabolic disorders. The rich avocado base will ensure your dose of healthy fat to keep those issues at bay.

OLYMPUS DIGITAL CAMERA

This mousse is similar in texture to the famous instant Jell-O pudding I grew up on, only leaving out the chemical cocktail of ingredients that comes along with it. Getting processed food out of the diet is the first step toward good health, and this is an easy replacement. Ingredient labels of highly processed food is always a lesson in linguistics, and this one has some true winners:

Ingredients in chocolate Jell-O pudding: Sugar, Modified Cornstarch, cocoa processed with alkali, disodium phosphate, salt, tetrasodium pyrophosphate, mono- and diglycerides (to prevent “foaming,” duh), red 40, yellow 5, and blue 1, BHT (preservative).

I’m sorry, did you say tetrasodium pyrophosphate? Does the FDA have a recommended dietary allowance for that delicious sounding additive?

Ingredients

 
This is a tried and true combo that can’t go wrong with your own preferences. If you are more of a dark-chocolate lover, simply add more cocoa. If your sweet tooth is yearning for something richly decadent, simply add more maple syrup.
 

Chocolate Avocado Mousse

  • Servings: 4
  • Difficulty: Easy
  • Print

Ingredients

Chocolate Avocado Mousse:

  • Two large ripe avocados
  • 1/3 cup semi-sweet chocolate chips, melted
  • 1/4 cup unsweetened cacao powder
  • 1/4 cup coconut milk
  • 1/4 cup maple syrup, or more to taste
  • 1 teaspoon vanilla extract

Optional Toppings:

  • Full-fat coconut cream
  • Fresh strawberries, raspberries, blueberries or bananas
  • Cacao nibs, chocolate chips, or chocolate shavings
  • Hemp hearts or slivered blanched almonds

Directions

Halve and pit the avocados and drop into a food processor bowl. Combine melted chocolate, cacao powder, coconut milk, maple syrup, and vanilla into food processor and pulse, scraping down sides as you blend. Continue to pulse until mousse-like consistency is achieved. Spoon into four single serving jars or ramekins. Enjoy immediately or refrigerate for a firmer texture and keep cold until ready to serve!

Photos and Content Copyright © Jaclyn Beaty Nutrition, 2018


Caramel Sea Salt “Ice Cream”

Tennessee summers are brutal, and when the weather man says his famous forecast of “hot, hazy, and humid all week,” there’s just no escaping it. Heat has never really bothered me, but I sweat a LOT, and have to be intentional about replacing electrolytes and fluids otherwise I pay for it in the form of leg cramps at night and afternoon fatigue. I’ve found this frozen dairy-free treat to be the perfect electrolyte replacement. The bananas contribute potassium and magnesium, the dates add a squeak of calcium, and the sea salt gives it the sodium. There you have the fab-four electrolytes, all in a sweet and cold treat.


I forgot to mention how EASY this is! All you need is your trusty food processor, a few hours to freeze, and the ingredients below:

Caramel Sea Salt Ice Cream

  • Servings: 2-3
  • Difficulty: Easy
  • Print

Ingredients

  • 3 ripe bananas
  • 4 pitted medjool dates
  • 1 Tablespoon maple syrup
  • 1 teaspoon vanilla
  • 1 teaspoon sea salt

Directions

In food processor, add all ingredients in order listed. Process until only small chunks of dates remain (because who doesn’t love a little contrasting texture in their ice cream?). If you prefer yours smooth, keep blending until no visible dates remain. Freeze for 2-4 hours. Banana cream should be a soft serve consistency when ready to eat.

Photos and Content Copyright © Jaclyn Beaty Nutrition, 2018